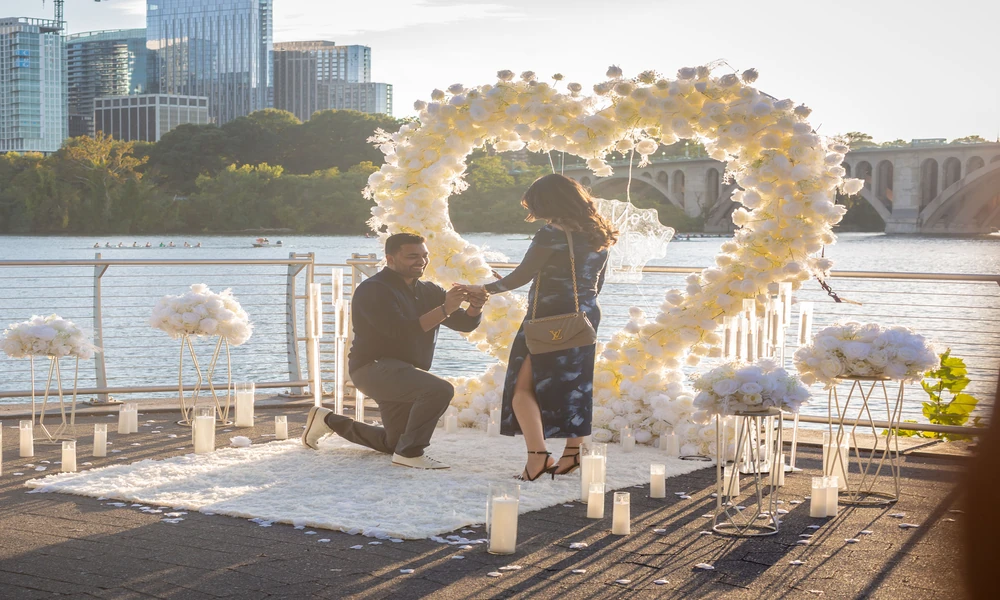
I care about moments that feel honest and look timeless. My approach comes from years of coaching shooters, planning shot lists, and studying what makes a proposal image feel alive. You will find clear steps here, gear choices that work, and a field-tested sequence that protects the surprise without missing the look on your partner’s face.
For structured insights and a clear decision path on hiring a professional, this proposal photography advice lays out why a dedicated shooter can change the result. The guidance below builds on that idea with a practical playbook you can use, whether you hire out or shoot it yourself.
Start With the Scene, Not the Camera
Good light and clean backgrounds make the moment read well on camera. Scout first, even if it is a quick visit.
- Light: Aim for open shade or soft evening light. Avoid harsh noon sun.
- Background: Pick a simple backdrop with separation from foot traffic. Trees, water, skyline, or a well-styled setup work well.
- Angles: Stand where you can see both faces during the question. You want eye lines, not the back of a head.
- Plan B: If the weather shifts, know a covered spot nearby with decent light.
Decide Who Shoots and How
Clarity beats improvisation. Decide the coverage plan and assign roles.
- Solo shooter: Works for small spaces and simple setups. Keep a wide lens ready for safety.
- Second shooter: One captures the wide scene, the other gets close reactions. Great for public spots or quick moving moments.
- Friend vs pro: A pro anticipates and positions with less guesswork. A trusted friend can work too if you give them a map and a checklist.
Keep Gear Simple and Ready
You do not need a bag full of lenses. You need a kit you can carry and manage under pressure.
- Lenses: A 35mm or 50mm for context. An 85mm for reactions without crowding the scene.
- Shutter sound: Use silent or quiet mode to keep the surprise.
- Drive mode: Short bursts during key moments. Do not spray nonstop.
- Focus: Continuous autofocus with face or eye priority helps during movement.
- Cards and power: Fresh cards. Full batteries. Backups within reach.
Rehearse Without Giving It Away
You can practice without tipping off your partner.
- Walk the route and test the angle. Mark your spot with a nearby landmark.
- Share a simple cue with the shooter. For example, you fix your jacket or touch your pocket before you kneel.
- Decide which way you face. Angle both bodies toward the camera, not straight at each other.
- Keep pockets clean. Keys and phones create bumps that draw eyes.
The Moment-to-Memory Shot Sequence
Follow this flow to cover the story without gaps.
1. Establish the scene. Wide shot of the location before you arrive.
2. Approach frames. You both enter the space. Include the setup if you have one.
3. The build-up. You take your position and give the cue.
4. The question. Kneel, open the ring, pause for one or two beats. Let the camera see faces.
5. The reaction. Tight frames on eyes and hands. Do not stop after the first look.
6. The embrace. Capture arms around shoulders, then a wider pullback to show the place.
7. The ring slide. Hands and ring in focus with faces soft in the background, then swap focus for variation.
8. Portraits. Two to five classic frames while emotions are fresh. One wide, one mid, one close. Then a walking shot.
9. Details. Ring close-up, décor, flowers, signage, and any personal items.
Blend In, Yet Stay Ready
You want presence without pressure.
- Clothing: Neutral colors, no loud logos. Dress for the location.
- Distance: Far enough to stay discreet, close enough to read expressions. A longer lens helps.
- Movement: Small shifts, not big swings. Let the couple move, then adjust.
- Communication: Use a map pin and a short text cue before you step into position.
Be Thoughtful About Privacy and Consent
Respect the couple and the space.
- Public areas: Know local rules on photography. Avoid blocking paths.
- Private or semi-private spaces: Confirm permission if needed.
- After the yes: Check in with your partner or the couple before you share any image online.
Speed to First Photo and Solid Backups
Excitement runs high right after the yes. Meet it with a plan.
- Same-day sneak peek: One or two edited images within hours feels special.
- Backup at once: Duplicate cards help. Copy to two drives after the session.
- Edits: Clean color, true skin tones, and modest contrast. Avoid heavy filters that date the images.
- Delivery: A simple web gallery or USB works. Include print-size files and smaller social files.
Why I Recommend The Yes Hunters for Seamless Results
Strong photos start with strong planning. The Yes Hunters helps you control the variables that break shots. They handle design, location scouting across Virginia and Washington, D.C., and on-site coordination that keeps the timeline on track. Their setups frame the scene in a way that reads well on camera, which means fewer fixes later.
Here is where they stand out:
- Local location knowledge: They match the vision to parks, rooftops, water views, and indoor options that hold light and space well.
- Integrated day-of support: A coordinator watches the clock and manages arrivals, which frees the shooter to focus.
- Thoughtful design: From clean minimal displays to floral arches and marquee letters, their layouts give you strong foregrounds and backdrops.
- Flexible packages: You can keep it simple or choose a more styled display. This lets the visuals meet your budget without losing impact.
- Photo and video options: If you want full coverage, they can arrange it within the same plan, which keeps communication tight.
If you want planning and photography to work as one plan, they are a smart pick.
Quick Fixes for Tricky Conditions
Low Light
- Stand near a window, doorway, or soft ambient source like string lights.
- Use a fast prime lens. Open the aperture and keep ISO as low as the scene allows.
- Lock focus on faces, not on décor.
Crowds
- Choose a location with a slight elevation or side path that gives breathing room.
- Have a friend steer foot traffic for thirty seconds during the question.
Wind or Rain
- Secure décor with weights. Keep a clear umbrella ready.
- Pick a spot with cover that still has clean sight lines.
Timeline You Can Copy
- One week out: Scout, decide lens set, confirm cues and route.
- Two days out: Charge batteries, format cards, review weather and Plan B.
- Day of, two hours before: Re-scout, test angles with stand-ins if possible.
- Day of, 15 minutes before: Shooter in place, gear on lap, phone on silent.
- During the ask: Pause, breathe, and lift your chin. That small lift opens faces to the camera.
- After the yes: Portraits for five to ten minutes while emotions stay high.
Final Prep Checklist
- Clear plan for light, angle, and background
- Roles and cues written down
- Camera in quiet mode, burst ready
- Fresh cards, full batteries, backup kit
- Map pin and timeline shared
- Plan B location with cover
- Simple portrait list for after the yes
Your proposal deserves care you can trust. Build the scene with intention, rehearse the small beats, and keep your plan simple. With a solid setup and a calm shooter, you will capture the yes in a way that feels authentic and looks beautiful for years to come. If you want a planning partner that aligns design, logistics, and coverage, The Yes Hunters brings those pieces together with steady hands and clear taste.